4. Calculation and Cutting [VERSION II]
 I
had been waiting for months for a newer version of BBMPEG so
that I could update these guides. The reason for waiting was
due to bbMPEG not being able to take any input bigger than 2GB
until the latest version now. (Yes, the program is that old!)
As well as cut in a much better way than using TMPGEnc. I
had been waiting for months for a newer version of BBMPEG so
that I could update these guides. The reason for waiting was
due to bbMPEG not being able to take any input bigger than 2GB
until the latest version now. (Yes, the program is that old!)
As well as cut in a much better way than using TMPGEnc.
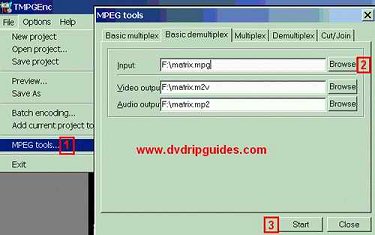
First, we must demultiplex (separate a combined video+audio
file into 2 files) with TMPGEnc.
1. File -> MPEG Tools.
2. Basic Demultiplex tab, select your .mpg file created by encoding.
The VIDEO and AUDIO will automatically be filled to the same
location as the .mpg. If you dont have the space, at this point
you can delete the d2v and wav from DVD2AVI. Keep the VOB's
because you can always start from them, or delete them if you
still have the DVD. *cough*
3. Click Start and you must be patient... and remember TMPGEnc
almost never freezes. When you think it's frozen, give it time,
leave it alone.
Now, Please download the
latest
bbMPEG, make sure to grab the XP
patch also if you're using Windows XP, and run "avi2mpg2.exe".
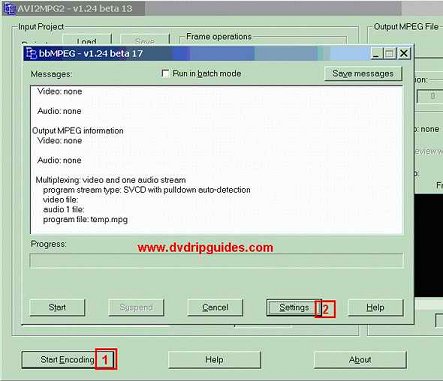
1. Click here. A new window will open up.
2. Click here. Another window will open up which is down below....there
is one picture for each of the tabs.
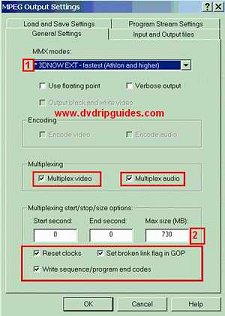
1. This is AUTO-DETECTED. You shouldn't have to change it.
2. The Max Size in MB should be 9 * the number of minutes of
the CD size. I recommend 730 (for 74min CDs) and 790 (for 80min
CDs) because the actual DATA that has to go on the CD in order
to make it SVCD compliant is about 6megs added by Nero.
The other info in red should be exactly the same.

1. This is the OUTPUT. Select a drive with space on it.
2. This is the Video Source (VS), the demultiplexed m2v file
we got from TMPGEnc.
3. This is the Audio Source (AS), the demultiplexed mp2 we got
from TMPGEnc.
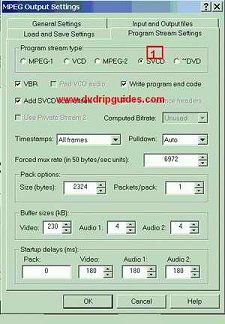
1. This is ALL you have to choose here. Just select SVCD and
do NOT touch anything else.
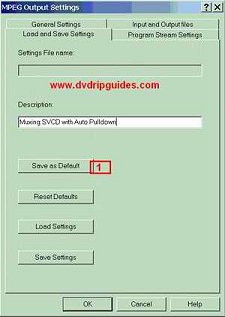
1. Click here to save these settings for the future.
Now you can click OK at the bottom of the window, then click
START on the button from the first bbMPEG screen pic at the
top of this page.
The multiplexing and cutting process has begun and will take
a few minutes. You may also notice that your CPU is under heavy
usage.. so don't try and get a game of QuakeIII in right now.
Some possible errors that can occur here are MANNNNNY PTS or
DTS "underflows". In my experience with bbMPEG, you can ignore
them. I am not sure if you should for any specific standalones.
So I provide you with this info.
When it is done, press OK and close bbMPEG. You will have files
numbered filename00, filename01, and so on.. of the exact size
that you specified.
Time to burn...
<- Step 3 Step
5 ->
|